
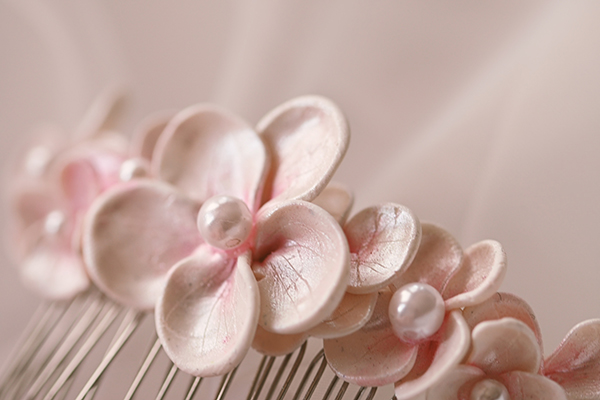
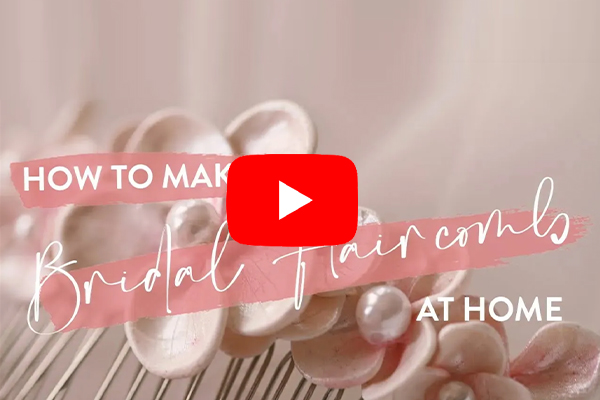
Wedding DIY: Make Your Own Bridal Hair Comb
Fancy getting crafty? Here's our step-by-step guide on how to fashion your own floral hair comb, ideal to complete your aisle style!
You will need:
Polymer Clay (pick a colour that matches your wedding theme, and if you can’t find one - hang on, we will tell you a little secret!)
Round-ended tool (choose from a tool from a clay sculpting set, makeup brush or sharpie)
Needle or pin
Hair Comb (find it online or in your local craft shop)
Soft brush (old clean makeup brush will do)
Something sharp to cut the clay (no need for special tools - everything you need you probably have at home! Razor? Small sharp kitchen knife? X-acto knife from previous crafting project?)
Optional:
Mica powder (don’t sweat if you don’t even know how to pronounce it, you can use eye shadows you don’t use anymore)
Superglue
Pearl beads, rhinestones or gems for the centre of the flowers
Step One
Clean your creative work area using a damp kitchen towel and allow it to dry. Meanwhile, wash your hands with soap and dry them using a kitchen towel (this is to eliminate the risk of small particles from fabrics and clothes sticking to your art piece!)
Step Two
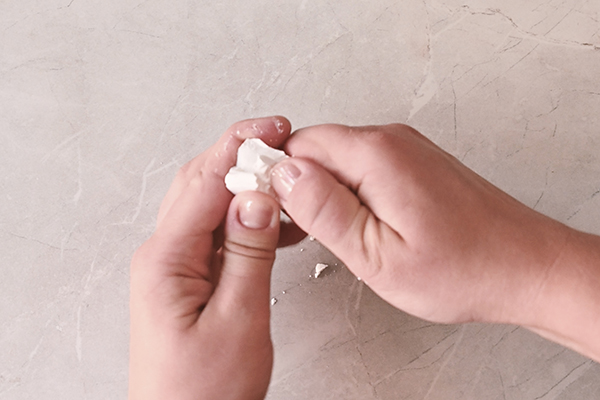
Knead your polymer clay until it is soft and elastic in texture. Be prepared to have a little workout - it can take a while… And even if the clay is crumbling and falling out of your palms, continue conditioning (aka kneading) the clay - it will become soft and elastic eventually.
A little hack - if you find it hard to break the clay block you can break it into smaller pieces, condition them separately and join them all together when you think you are almost done with the kneading part.
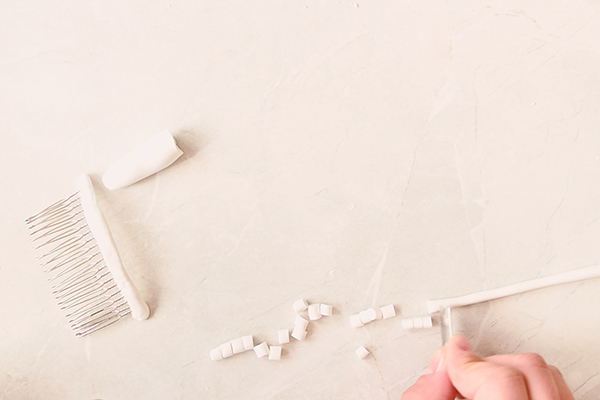
Step Three
Take a small piece of your conditioned clay and roll it into a snake shape. Try to roll it so it measures approximately as long as your hair comb base and thick enough so you can wrap it around the base to cover it completely. Once the snake is on the hair comb, make sure you haven’t left any bare metal showing and there are no long hanging pieces. You can try to smooth the clay with your fingers, but aesthetics is not very important at this point.
Step Four
Take another lump of polymer clay and roll it into a slim long snake, we are going to make petals! Once the snake is rolled, take something sharp to cut it - ideally you can use an x-acto knife, razor blade or even a small but sharp kitchen knife (just make sure you wash it very thoroughly afterwards). Chop the snake into small but fairly even chunks (or a few different sizes if you want different size flowers) - these will be your flower petals, so you will need a lot of them. A lot! Now turn those tiny clay chunks into tiny balls by rolling them in between your fingers or palms.
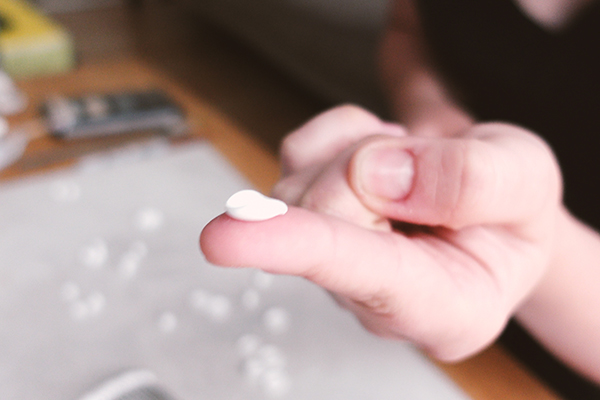
Step Five
Take the round-ended tool in one hand and a small clay ball into another. Press the tool into the clay ball until it squishes and then roll and swing the tool while still gently pressing the clay, you will form a tiny wonky pancake and this is what we want for our petals! You can carefully take one end of the petal and pinch it between your fingers to create a more sculpted look.
Please note: if you notice that clay balls are cracking and breaking when you apply the pressure it means that you haven’t conditioned your clay well enough. To fix that you can roll each ball in your palms for a little while, just before using the round-ended tool.
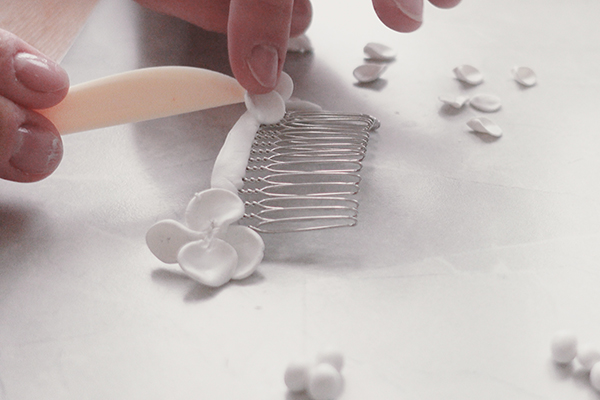
Step Six
Now you have a lot of flower petals on your worktop and it is time to arrange them on the hair comb base. Think how many petals each flower should have and how many flowers you want. Take each flower petal one by one very gently and press one corner into the hair comb base. If you decided to pinch your petals in step 5, press the pinched part to the base and use the other end of a paintbrush (or something pointy but not sharp) to secure it on the base. Continue to complete the first flower and move to another, until you are happy with the design.
Tip: If you want the central flower exactly in the middle, start your design from the sides moving towards the centre, so the middle flower will sit on top of the others.
Step Seven
So you couldn’t find that perfect shade in the craft store’s polymer clay section? And you don’t know what mica powder is? No worries. Grab that old eye shadow palette and pick the shades! We made it white and pink for a dreamy and romantic look, but maybe you want to try some light blue and silver? Or even gold? Take your soft paintbrush, dip it well in the eye shadows and gently apply on the polymer clay flowers. Be very gentle, as polymer clay is very soft and easy to change its form, and we don’t want that after all your hard work! Feel free to mix and match colours if you want to, just see how they blend together on a scrap piece of clay first as there is no way of cleaning it off.
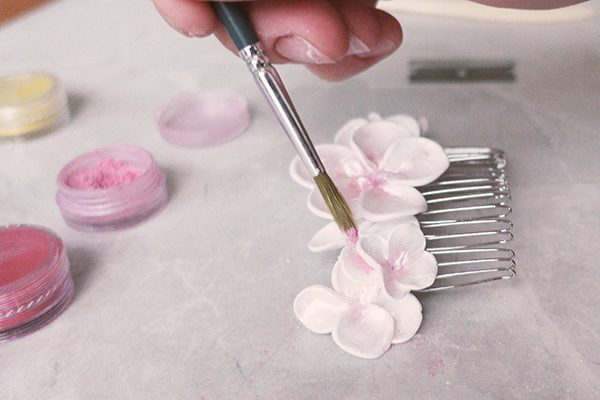
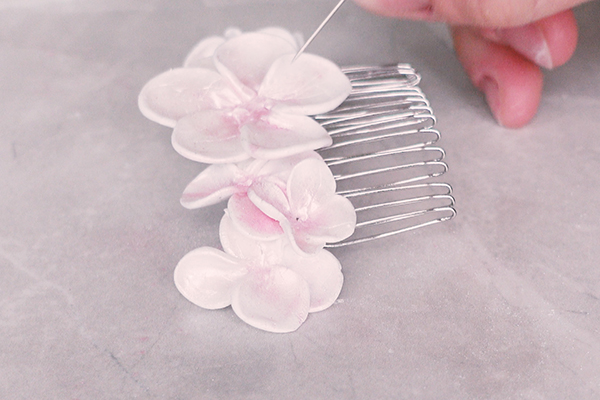
If you want a more realistic look now it is time to take that needle and very gently, using minimal pressure scratch the petals’ surface drawing the veins. Be very gentle, make sure the needle only leaves a slight mark rather than ripping through the clay.
Step Eight
It looks gorgeous, yes? Okay, now find the polymer clay package and read the baking instructions. Yes, baking instructions… Usually it is approximately 130C and bake for 20-30 minutes, but follow the specific brand’s instructions. To make it as clean as possible, put your hairpiece facing up on an old flat ceramic plate which you will not use for food anymore, or place some baking paper on a baking sheet or a plate and bake according to instructions. General hack for baking polymer clay is better to use slightly lower temperature than slightly higher, and baking time can be a little bit shorter rather than longer. Also smaller pieces bake much quicker than big ones, so always keep an eye on it (we baked ours for only 20 mins).
Step Nine
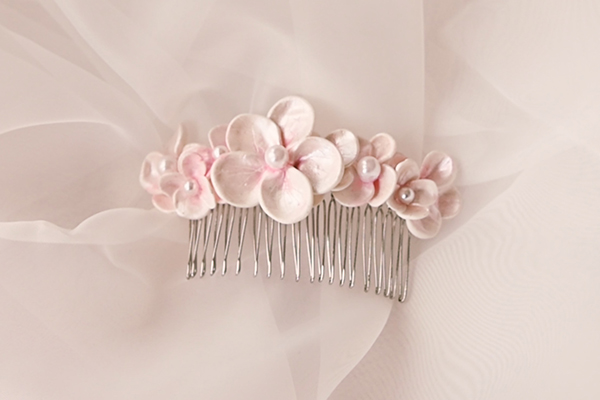
Your hair comb is now baked and almost ready to use, but what about the flower middles? What did you decide to use? Rhinestones? Pearlbeads? Something else? Or you just left a few clay balls from step 4 and placed them on before baking?
We chose to use pearl beads and now it is time to glue them on. Simply apply some glue on the flower middles and press the beads or rhinestones in, and leave it to dry.
Step 10
Try it on and share a picture with us - @weddingshoneymoonsmedia


Subscribe to our newsletter
For the latest news, magazine releases, trends, inspiration, wedding planning tips and exciting launches delivered straight to your inbox!